
Introduction
Chatbots and serverless are two tech trends that have completely dominated the corporate world in 2020:
Why not kill two birds with one stone and learn how to build your own serverless chatbot?
By the end of this article you will know how to:
- Deploy a serverless application in Azure and,
- Build a chatbot that can be embedded into a website, connected to Microsoft Teams, Slack, Skype, Facebook Messenger and many other channels!
Why Chat Bots?
We all know by now that in years to come chatbots will become increasingly prominent in organisations around the world. From optimising the exchange of information between companies and costumers to completely replacing sales teams.
According to a paper published by Juniper Research, we can expect that up to 75% of queries in the customer service sector will be handled by bots by 2022 driving business costs of $8 billion dollars per year.
Why Serverless?
Serverless applications are another huge trend in tech, they allow for the deployment of simple applications online without the need to set up or manage any sort of server infrastructure. Moreover, with the great cloud services now made available companies such as Microsoft and Amazon, it is possible (and very easy) to scale your application completely in accordance to usage, so you only pay for how much you use, and never have to worry about not having enough bandwidth!
Tutorial:
Now we will go through a few steps to get your bot built and set up.
What you will need is simply an Azure Subscription, Visual Studio Code (VSCode) installed in your machine alongside some version of Python!
Step 1: Register a new Web App Bot service on Azure Portal
First login to the Azure portal and look for Web App Bot on the search bar, this should allow you to navigate to the Bot Services page where you can create a new Web App Bot on Azure Portal.

Click on add to create a new service, this will take you to the following page where you will have to choose a bunch of configurations, you might need to create a new resource group, and make sure you choose the S1 pricing tier, (all we will need for now).
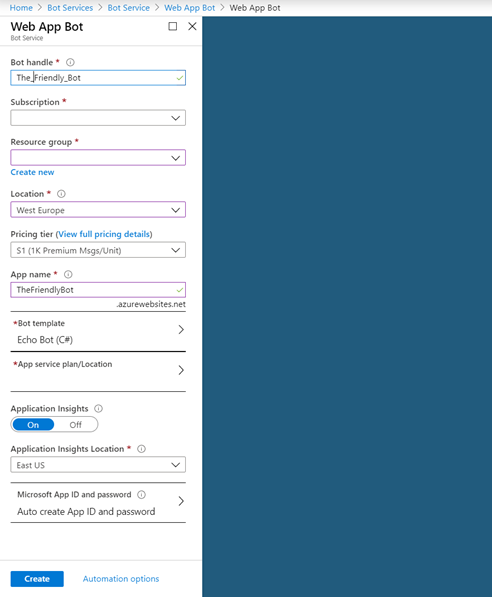
Choose the Echo Bot C# template, we will modify the template slightly to connect the bot to our API later.
Step 2: Set up Azure access through VSCode
At this point, we will create the back-end that our bot will interact with. There are multiple ways of doing this, you could create an API in Flask, Django or any other framework.
We will use the Azure Function App since it makes it very simple to set up a serverless API that scales beautifully with demand.
First, create a new folder and open it on VSCode:

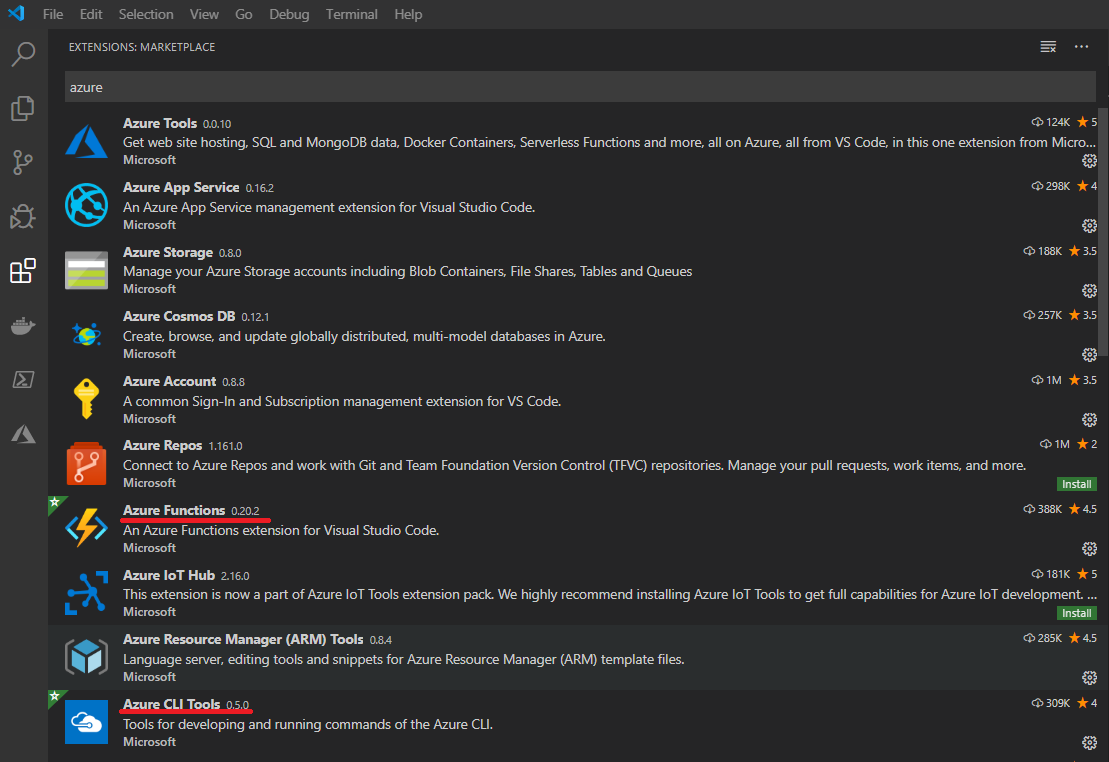
Now we need to install a few extensions that will help us create a Function App and push it to Azure, namely we want Azure CLI Tools and Azure Functions.
Once you’ve installed the extensions to VSCode you can log in to your Azure subscription through VSCode to manage resources from there!
Press CTRL+SHIFT+P to open the VSCode command pallet, then type in Azure Sign in.
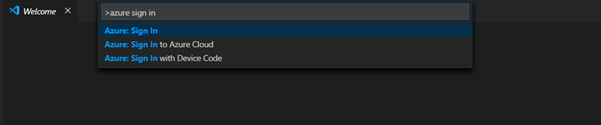
Once you’ve signed in you should see this on the bottom bar of VSCode:

Step 3: Create a new Azure Function App project
Navigate to the Azure function tab in VSCode and create a new project:

Follow the prompt that will appear on VSCode command pallet:

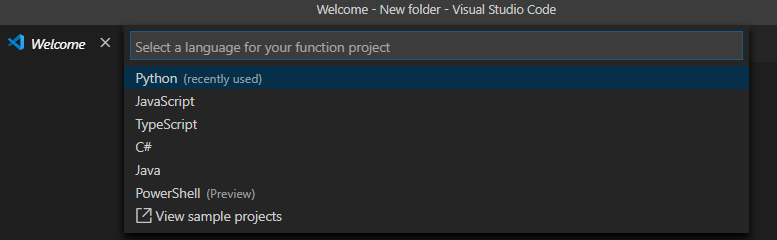
Select the language to use (in this case Python) and create a new virtual environment:
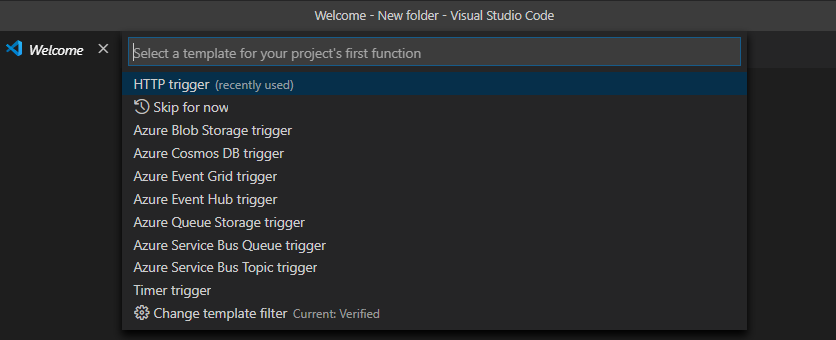
As our template we will be using the HTTP Trigger:
We will make our security option Anonymous, this means that anyone can access your API without the need for an API key, you can read more about the authentication settings here:
Finally, choose a name for the folder holding your serverless Function App and press enter.
Step 4: Modify the code for your Function App
Now that you’ve created your function app, a folder structure should have been automatically generated for your project. You should see a folder with the same name as you’ve just passed when creating your project in Step 3.
In this folder there should be a python file called __init__.py, looking something like this:
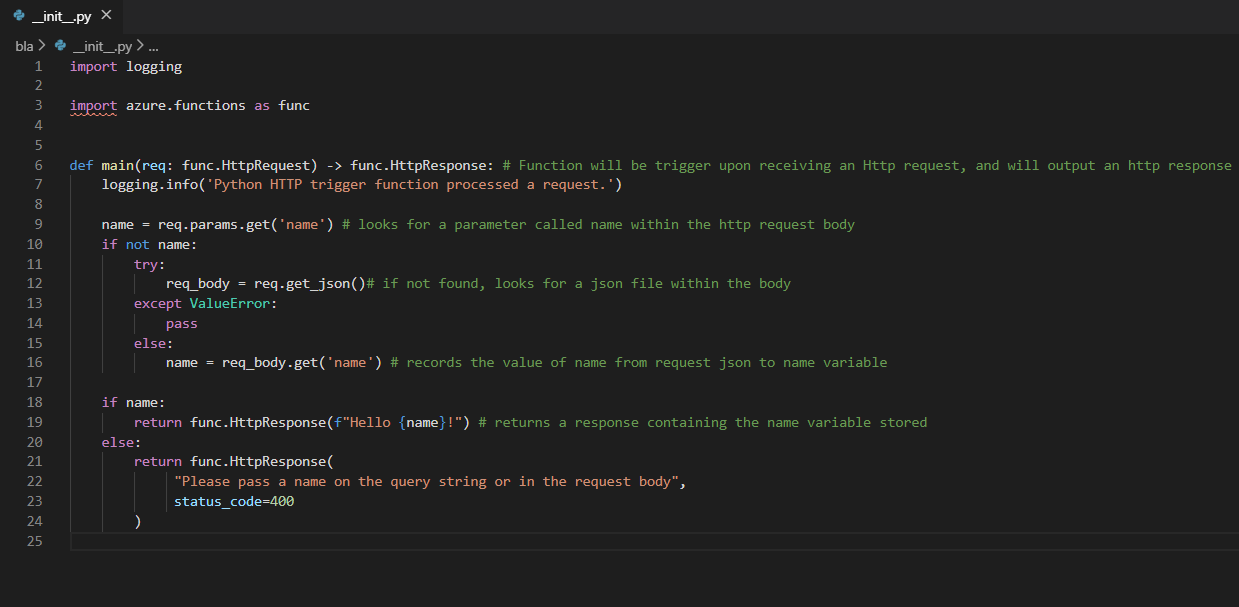
The syntax for the main function definition can look a little daunting at first even for experienced Python programmers:
def main(req: func.HttpRequest) -> func.HttpResponse:
This piece of code is simply specifying that the function will execute upon receiving an a request object, and will return an HTTP response.
From here we can easily modify this template to add the functionality we want to serve through our bot interface, this could include for instance querying data from a SQL database, triggering other functions or whatever other jobs you might need your bot to do.
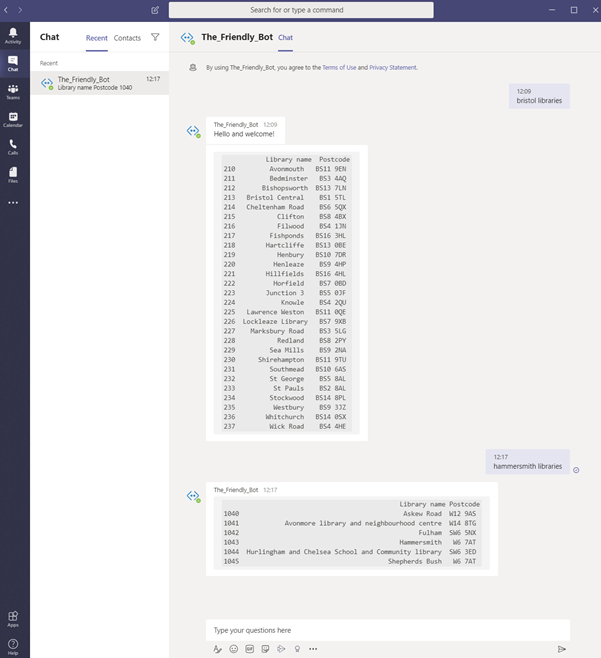
For this use case, we will be using open UK government data: our serverless function will get an HTTP request containing the name of a city in the UK and it will return a list of all the libraries in that city.
Let’s create a folder in our application called modules and a new file inside it called library_finder.py .
Your project at this point should be looking something like this:

Inside library_finder.py paste the following code snippet:
https://gist.github.com/arifmarias/bb85722ef6525d74cef80fc5efa843e3You will need to install pandas in the virtual environment that was created for us by the azure function.
If you’re unfamiliar with virtual environments, check out this link:
Our virtual environment has already been set-up, we just need to activate it now. This can easily be done in vscode by typing
.venvScriptsactivate
into the terminal window in VSCode.

If your environment has been successfully activated, you will see (.venv) in the beginning of the path.
Now we can install pandas, simply type ‘pip install pandas’ into your console

(the same process can be repeated for any other external library you wish to install through pip).
Now we can go back to __init__.py (our main file for the serverless application) and modify the code so that upon receiving an HTTP request (a) we will look for a text field on the json attached to the body of the request, (b) we will read the text and parse it, (c) we will call the function we have just defined and return the data requested.
The following code will work for our purposes:
https://gist.github.com/arifmarias/c59e78801eb9c55d68c2ae28b97f5e1aStep 5: Test your API locally
We have now created a basic serverless API using Azure Functions, it’s time to test if we have everything working as intended!
We can start our Azure function app locally. To do so type the following command into the terminal in VS Code:
func start
Your function will be initialised and you should see the iconic Azure Function App logo!
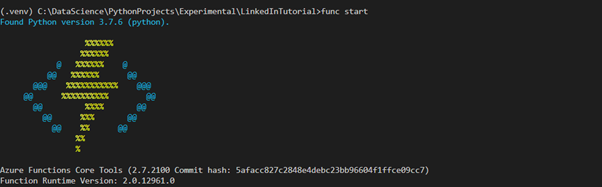
If everything worked, you should expect to see no errors and a message like this at the end of the prompt:

This message contains the URL to communicate to the serverless application we started locally. This can easily be done using a free software called Postman. In Postman you can debug your API by sending a request and viewing the response.

Alternatively, you can test whether the API is working by opening Python in a command prompt window and sending a request to the specified URL, and checking that we get the expected response.
Step 6: Deploy your Function App to Azure
Now that your server-less application is working and you have successfully created an HTTP trigger, it is time to deploy it to Azure so you can access it from outside your local network.
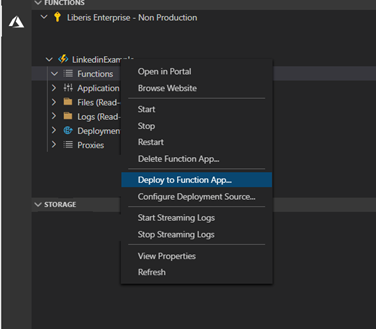
To deploy it, simply navigate to your Azure tab in VScode and scroll to the functions window.
Right click your Azure subscription and press Create Function App in Azure.

The prompt will ask you to name your function, provide a location and a version of Python. Follow the steps as required and wait until your Azure function has been created. You should be able to find it in the Azure Functions tab, once again right click on the function and select Deploy to Function App.
A prompt will come up asking to confirm the deployment, then after a few minutes, a message should come up to indicate the deployment has been successful.
When that happens you can check if your deployment worked by opening a browser window and navigating to:
https://[name_of_your_functionapp].azurewebsites.net/
You can also find this link if you navigate to your Function App in the Azure Portal page.
Once you access the link you should see this page:
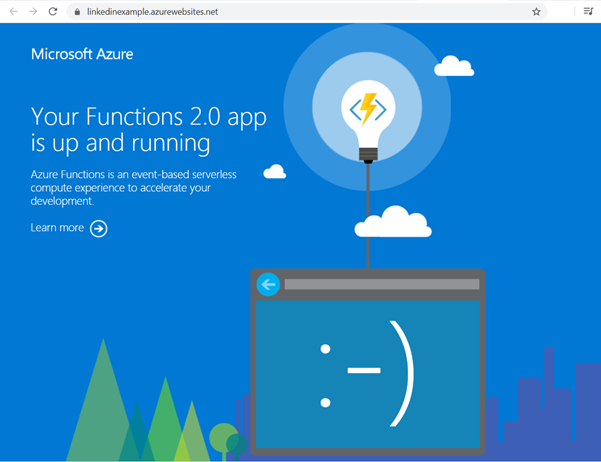
That means that you have successfully deployed your Function App to the internet, now anyone can access your server-less API! (depending on the authentication setting you chose when you created the HTTP trigger)
Step 7: Connecting the BOT to the Server-less Function
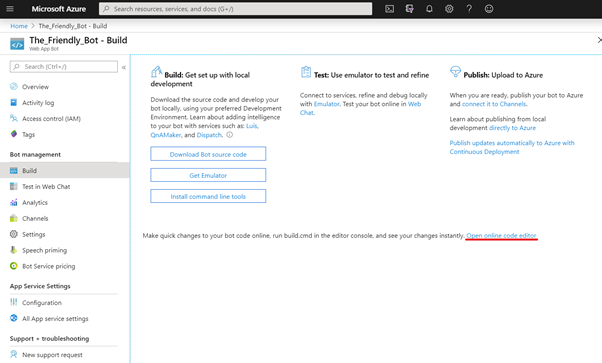
For this step, we will go back to the Bot APP Service we created in Azure portal in Step 1 of this tutorial!
Navigate to the web bot service homepage and go to the build tab, then click on “Open online code editor”.
From the online code editor navigate to Bots > EchoBot.cs
This will allow you to make some slight modifications to the C# code for the bot, this is what you should see initially:
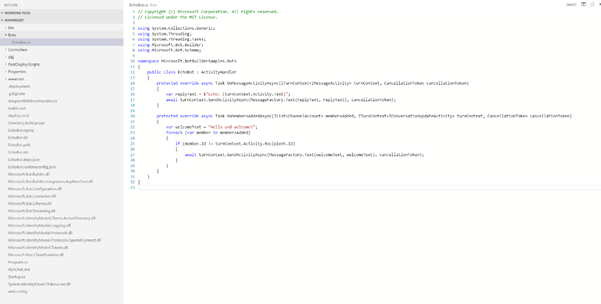
Replace the code on this page by the code provided below:
https://gist.github.com/arifmarias/a2b658deb476c595093179a953401555Remember to replace the URL for the URL access point of the Azure Function App we created in the last step!
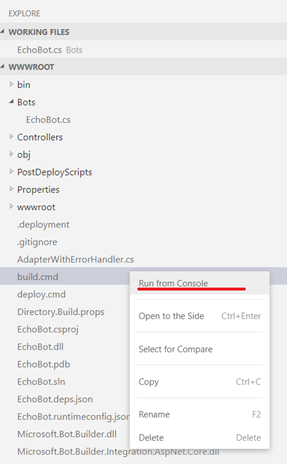
Now we just need to build the modification we’ve made to the C# code, this can easily be done by right clicking the build.cmd file on the page
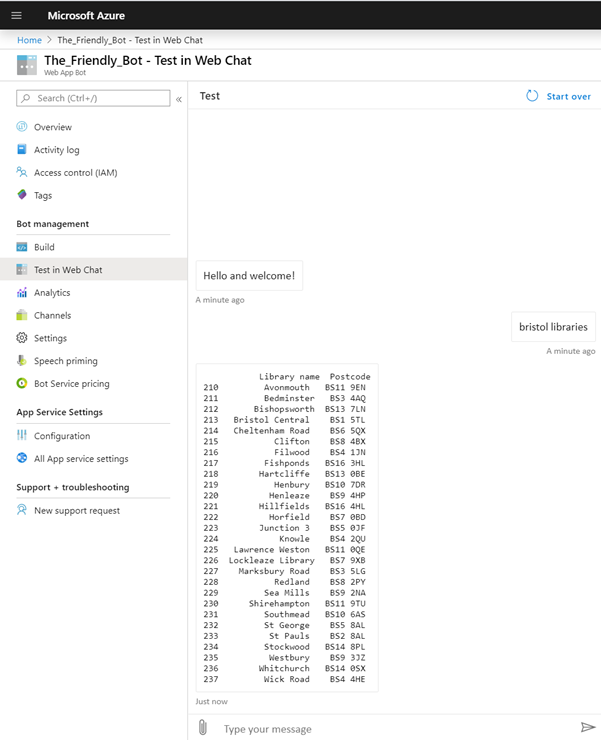
We can test our bot and check if it it’s all working as intended. Open Azure Portal and navigate to your Web App Bot main page.
Select the option Test in Web chat:
Step 8: Publishing your Bot to a Channel
If everything works as intended you are ready to add this bot to any of the supported channels.
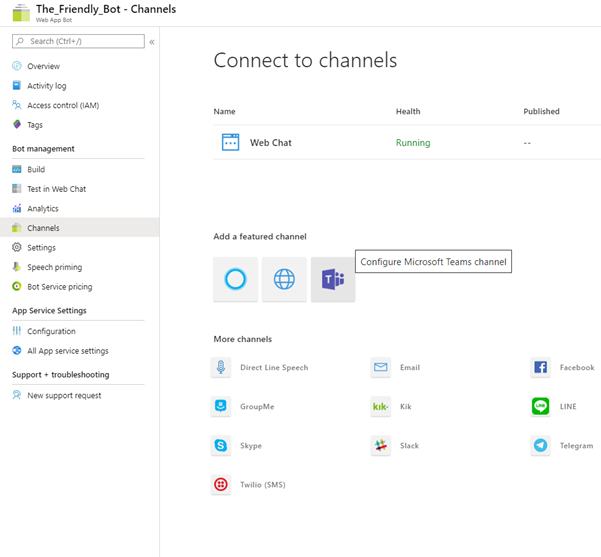
Configure the Microsoft Teams channel by pressing save and accepting the terms of use.
Next, we can provide someone the link to talk to our bot by pressing the ‘get bot embed codes’ link and copying the URL inside the HTML tag.
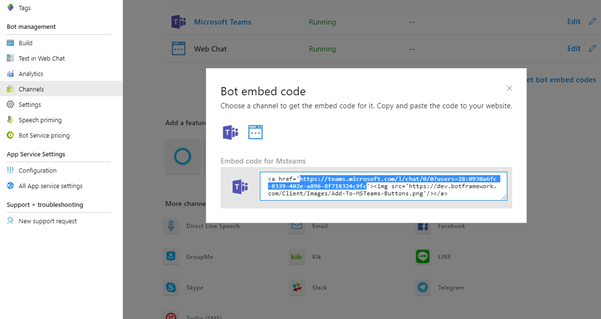
Anyone that accesses the URL will be invited to add the bot on MS Teams as such:
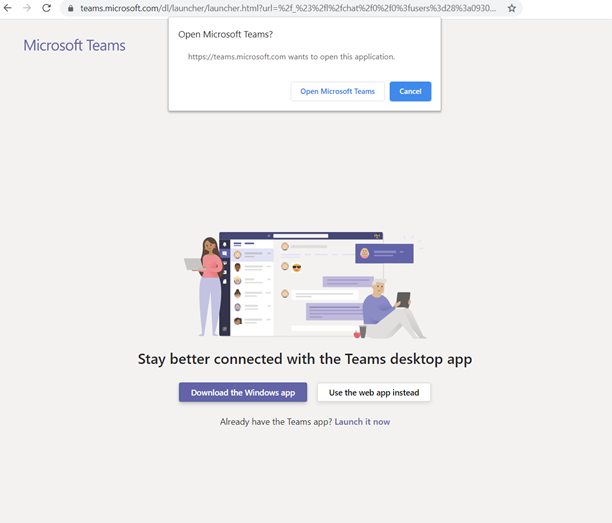
MS Teams will open up and our Bot should be listed as one of your chats.
Step 9: (Optional) Publish your Bot App to MSTeams
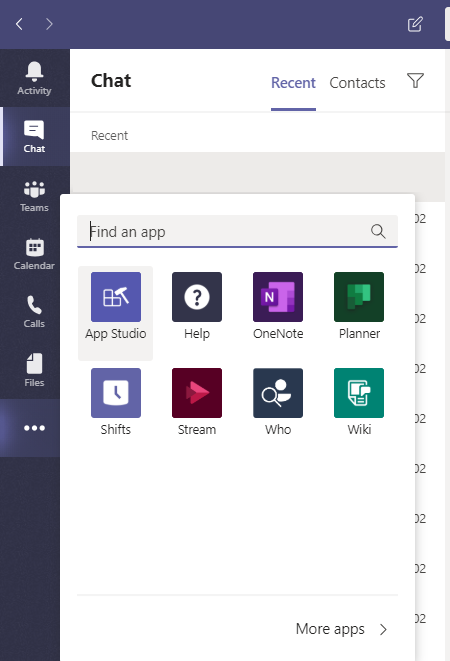
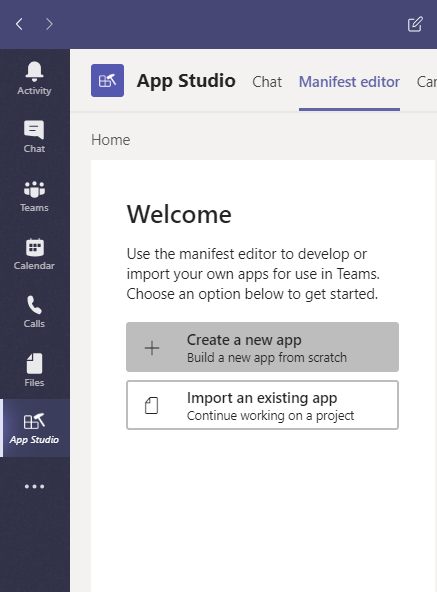
This might be enough to satisfy your bot needs, if you’d wish to publish the bot, so it can be added to a group chat in MS Teams, you can do so by opening MS Teams and clicking on the ‘…’ icon, and opening the App Studio:
Click on Create a new app:
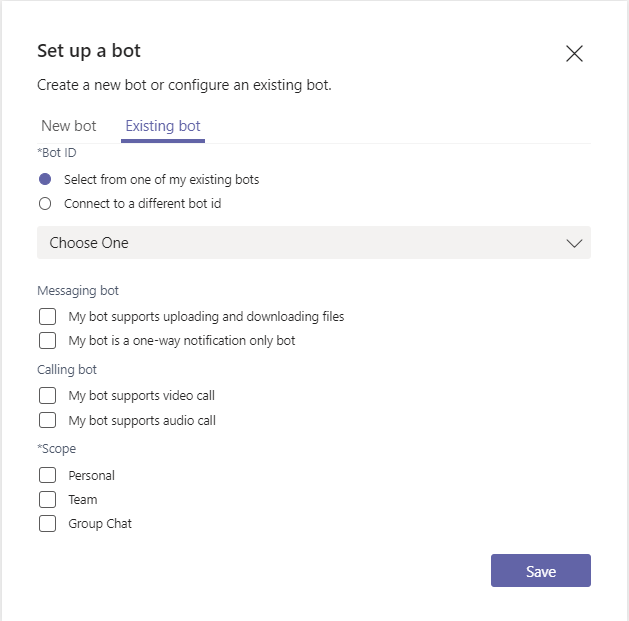
You will have to fill in the registration form. Importantly, once you’ve filled in all the required information, navigate to the Bots tab and press the Set up button:

In the Existing Bot tab, the bot we’ve just created should be listed on the drop down menu
The last step is to navigate to the test and distribute tab on the manifest editor and install your app in teams.

You’ve configured your MS Teams app all you need to do is invite the bot to a particular team and enjoy your new server-less bot app!